Removing an LCD screen from a phone or tablet is a delicate and critical process for repair technicians. The use of an LCD separator machine has revolutionized the way professionals handle screen removals, making the task faster, more efficient, and less prone to damage. In this guide, we’ll take you step by step through the process of using an LCD separator machine to remove an LCD screen safely and effectively, as well as troubleshooting tips for common issues you may encounter.
What is an LCD Separator Machine?
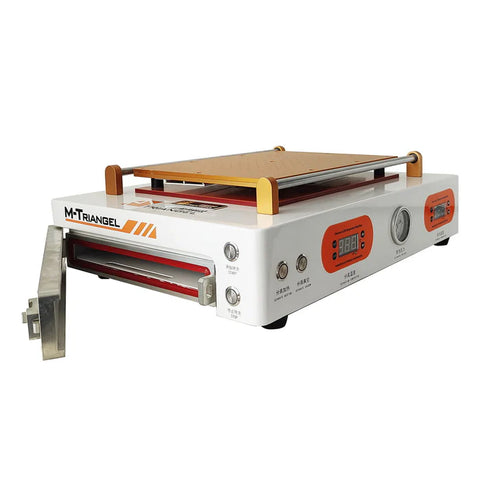
An LCD separator machine is a specialized device designed to separate the LCD screen from the digitizer or glass panel in smartphones, tablets, and other electronic devices. The separation process is necessary when a screen is cracked or damaged, and it allows the technician to replace only the glass or digitizer without having to replace the entire LCD panel.
These machines use a combination of heat and pressure to soften the adhesive that bonds the LCD to the glass, allowing the technician to remove the screen cleanly. An LCD separator machine is a must-have tool in any phone repair shop, as it ensures a more efficient repair process and minimizes the risk of damaging the delicate components of the screen. Of course, you want to buy a new LCD Screen Separator, please click to buy.

Why Use an LCD Separator Machine?
Before the introduction of LCD separator machines, technicians would rely on hand tools, heat pads, and other methods to remove the glass or digitizer from the LCD. While these methods could work, they were often time-consuming and prone to errors.
An LCD separator machine has several advantages over traditional methods:
- Precision: The machine allows for controlled application of heat and pressure, ensuring the screen is separated without damaging the LCD or the surrounding components.
- Efficiency: The entire process is quicker, which means less downtime for the technician and faster service for customers.
- Consistency: With an LCD separator machine, the same process can be repeated consistently, leading to better results with each repair.
- Minimal Risk of Damage: The machine ensures the adhesive is softened properly without overheating or applying excessive force, reducing the risk of cracking the LCD or damaging other internal components.
Step-by-Step Guide: How to Remove LCD Screen Using a Separator Machine
Step 1: Prepare Your Work Area
Before you begin the screen removal process, make sure you have a clean, organized workspace. Ensure that the LCD separator machine is properly set up and that all necessary tools are within reach.
Essential Tools and Materials:
- LCD separator machine
- Heat-resistant gloves
- Suction cups or pry tools
- Safety goggles
- Protective mats or trays
- Isopropyl alcohol (for cleaning)
- Replacement screen (if applicable)
Make sure your LCD separator machine is placed on a stable surface, and double-check that it is plugged in and functioning properly.
Step 2: Set Up the LCD Separator Machine
Before placing the device into the machine, adjust the settings for heat and pressure. These settings will depend on the model of the machine, the type of phone or tablet you’re working on, and the thickness of the adhesive. It’s always a good idea to check the manufacturer's recommendations for optimal settings.
- Temperature Setting: Typically, the temperature should be set between 80°C and 120°C. Too low a temperature may not soften the adhesive enough, while too high a temperature can risk damaging the screen or the internal components.
- Pressure Setting: The pressure should be applied gently at first, gradually increasing once the adhesive begins to soften.
Step 3: Place the Device into the LCD Separator Machine
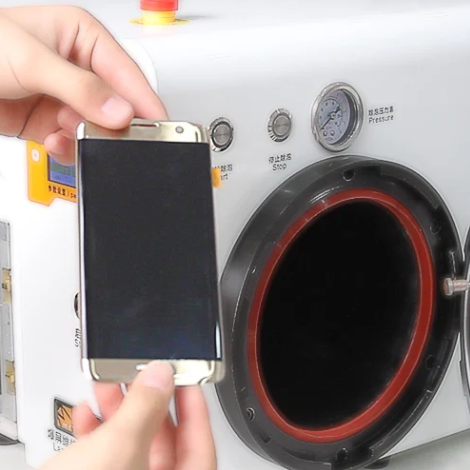
Once the machine is set up, carefully place the phone or tablet into the machine. Position the device so that the screen faces upward. Most machines come with a vacuum or pressurized system that holds the device in place, preventing it from shifting during the separation process.
If your separator machine uses a vacuum, turn it on to ensure the device is securely held. If you are working with a device that has a cracked screen, use suction cups to hold the glass in place.
Step 4: Apply Heat
Next, the machine will apply controlled heat to soften the adhesive between the LCD and the glass or digitizer. This is one of the most critical steps in the process. It’s essential to monitor the time to prevent overheating.
Heat should be applied for anywhere between 2 to 5 minutes, depending on the type of device. Be sure to check the temperature of the device periodically. Some LCD separator machines have built-in timers that will help ensure the device is heated for the correct duration.
Step 5: Apply Pressure to Separate the LCD Screen
Once the adhesive has softened, it’s time to apply pressure. Carefully adjust the pressure settings on the separator machine to gradually separate the LCD screen from the glass.
The pressure should not be too forceful, as excessive force can crack the LCD or break the glass. If you’re using a manual separator machine, you may need to gently pry the glass away using a pry tool or suction cup.
Step 6: Remove the LCD Screen
After sufficient pressure has been applied and the adhesive has been softened, the LCD screen should come away from the glass or digitizer with ease. Use a suction cup or pry tool to gently lift the screen away.
If the screen doesn’t come off immediately, avoid forcing it. Instead, apply a bit more heat and pressure to loosen the adhesive further before attempting to remove the screen again.
Step 7: Clean Up and Inspect the LCD
Once the screen has been successfully separated, inspect the LCD to ensure there are no residual adhesive residues that could interfere with the next repair step. You can use isopropyl alcohol and a lint-free cloth to clean any leftover adhesive.
Now, the device is ready for further repairs, such as replacing the glass, digitizer, or other internal components. For LCD screen operation check out this guide.
Troubleshooting Common Issues with LCD Separator Machines
While LCD separator machines are highly effective, they can sometimes experience issues. Here’s a list of common problems and solutions.
LCD Separator Machine Not Heating
- Problem: The machine is not reaching the desired temperature.
- Solution: Check the power supply and the temperature settings. Ensure the machine is plugged in properly and that the heat elements are working. If the issue persists, inspect the machine for internal faults or contact the manufacturer.
LCD Separator Machine is Not Working Properly
- Problem: The machine is not functioning as expected (e.g., not separating the screen, not applying heat).
- Solution: Inspect all connections, including the vacuum system, and ensure the machine is set to the correct parameters. Check for any blockages in the machine’s heating system or malfunctioning parts.
LCD Separator Machine Cleaning Tips
- Problem: The machine has accumulated dust, adhesive, or other residues.
- Solution: Regularly clean the machine using a soft cloth and isopropyl alcohol to remove any excess adhesive or debris. For more thorough cleaning, use compressed air to blow out dust and particles from the internal components. Always follow the manufacturer's cleaning instructions.
Why is My LCD Separator Machine Too Slow?
- Problem: The machine takes too long to separate the screen.
- Solution: Ensure the temperature and pressure settings are correct. If the machine is too slow, it could be a sign that the adhesive is too thick, or the heat is insufficient. Adjust the temperature and pressure settings or allow the device to heat for a longer period.
LCD Separator Machine Pressure Settings
- Problem: Not sure how to set the pressure correctly.
- Solution: The ideal pressure will vary based on the model and the device you're working with. Start with low pressure and gradually increase until the screen separates. Always follow the manufacturer’s recommended pressure settings for optimal results.
LCD Separator Machine Troubleshooting
- Problem: The machine is malfunctioning.
- Solution: Perform a system check, ensuring that all settings (temperature, pressure, vacuum) are correctly adjusted. If the issue persists, consult the troubleshooting guide in the machine’s manual or contact customer support for help.
FAQ Section
LCD Separator Machine Not Heating
- Q: What should I do if my LCD separator machine is not heating up?
- A: First, ensure the machine is properly plugged in. Check the temperature settings, and inspect for any faulty heating components. If it still doesn’t work, consult the manufacturer or technician.
LCD Separator Machine is Not Working Properly
- Q: What causes my LCD separator machine to stop working correctly?
- A: Common causes include incorrect settings, malfunctioning heating or vacuum systems, or blockages. Check for any obstructions, reset the settings, and ensure all components are functioning.
LCD Separator Machine Cleaning Tips
- Q: How do I properly clean my LCD separator machine?
- A: Regularly wipe down the machine with a soft cloth and isopropyl alcohol. Use compressed air to clear dust from internal components. Avoid using abrasive materials that could damage the machine.
Why is My LCD Separator Machine Too Slow
- Q: My LCD separator machine is taking longer than usual to separate the screen. Why is that?
- A: The machine may be set to a low temperature, or the adhesive may be too thick. Adjust the temperature and pressure settings, or allow more time for heating.
LCD Separator Machine Pressure Settings
- Q: What pressure should I use for the LCD separator machine?
- A: Pressure settings vary depending on the device, but generally, low to medium pressure is ideal. Gradually increase pressure to separate the LCD, ensuring no excessive force is applied.
LCD Separator Machine Troubleshooting
- Q: How can I troubleshoot problems with my LCD separator machine?
- A: Check the machine’s settings, look for blockages, and inspect all components for wear or malfunction. If issues persist, refer to the user manual or seek support from the manufacturer.
Conclusion
Using an LCD separator machine is a precise and efficient way to separate an LCD screen from its digitizer or glass. By following the correct procedure, adjusting the settings, and troubleshooting common issues, you can ensure that your screen removal process is smooth and successful. As with any piece of equipment, regular maintenance and attention to detail will ensure your LCD separator machine works optimally, helping you deliver high-quality repairs every time.


